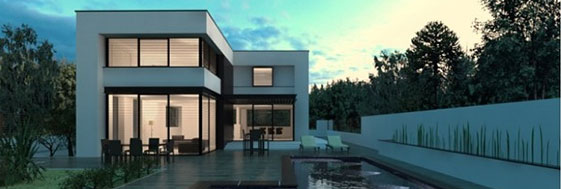
The Thea Render team has officially begun shipping its hybrid renderer, advertised as “the first commercial solution that contains both state-of-the-art biased and unbiased engines”.
Read more >>
Smoke 2012
Most coverage of Autodesk from the past week may have centered on its upcoming releases of 3ds Max, Maya et al, but the developer also has other updates in the works, including its Mac-only finishing software, Smoke.
Read more >>
Read more >>
This tutorial of the Florence Design Academy (www.florencedesignacademy.com), the leading Design School in Europe, explains how to create a glowing material by using architectural and standard materials. Additionally it will explain how to use the Glare shader to improve glow effects.
![]() |
| Glowing material |
Zbrush 4 : The Making Of Alien
Making of Alien by
Fabio Bautista, Colombia

ZBrush 4 is one of those software that always surprises with future and innovative . At the most recent release includes the new ZSketch feature. This one is based on the known ZSphere tool, which allows creating basic shapes from interconnected sphere structures. Through this new function, we can able to create structures even more complex by a more efficient way, getting better control and greater freedom to make them.
The process of zsketching consists in building up forms from strips of ZSpheres drawn freely in 3D space or applied to structures already created. This is similar to the technique of covering a wire armature with clay used in traditional sculpting.
Fabio Bautista, Colombia
ZBrush 4 is one of those software that always surprises with future and innovative . At the most recent release includes the new ZSketch feature. This one is based on the known ZSphere tool, which allows creating basic shapes from interconnected sphere structures. Through this new function, we can able to create structures even more complex by a more efficient way, getting better control and greater freedom to make them.
The process of zsketching consists in building up forms from strips of ZSpheres drawn freely in 3D space or applied to structures already created. This is similar to the technique of covering a wire armature with clay used in traditional sculpting.
The Making Of 'AH1Z Viper Helicopter'
Nasa used 3d for presneting sun
Nasa used 3D image for presenting the sun, they using its Solar TErrestrial RElations Observatory (STEREO) satellites.
The twin satellites, launched in 2006, were positioned on opposite sides of the sun to generate the images. Unlike the moon, which has a permanent far side, the sun rotates once about every 24.5 days. This means the whole surface is visible from earth over the course of a month, but if there is an event on the far side we would not become aware of this until at least another week later, if at all.
The STEREO satellites travelled 290 million miles to give scientists this unique view of the solar surface. From now on, solar structures and phenomena will be visible to scientists in three dimensions. This will aid their understanding of the star's physics, and improve their ability to predict space weather.
The twin satellites, launched in 2006, were positioned on opposite sides of the sun to generate the images. Unlike the moon, which has a permanent far side, the sun rotates once about every 24.5 days. This means the whole surface is visible from earth over the course of a month, but if there is an event on the far side we would not become aware of this until at least another week later, if at all.
Maya; Tutorial Maya Cloth
With Maya Cloth, you can create realistic animated cloth within the Maya environment. Maya Cloth gives you the ability to model garments for any animated 3D figure, apply dynamic effects, and simulate the cloth behavior. In this tutorial, we will create a simple scene on which we will play with cloth.
Read more...
Read more...
Material Tutorial: Glowing Material with Mental Ray
For this material you must use Mental Ray.
Glowing materials are very useful to create light effects. For example a neon-light effect.
This kind of material is a light-emitting material. It will create light and shadows like an Omni Light.
Let's check out the steps we are going to do:
1. Change in the material editor the Standard material to an Architectural -image 1-.
2. Choose the color of your glowing material in the diffuse color slot.
3. Now go to the setting "luminance cd/m2". This setting allows you to create a material which is able to emit light. This setting is very similar to the standard "self-illumination" slot. But in the architectural material you can add a value which is much more higher than 100. The higher the value the brighter the material's light emission.
Glowing materials are very useful to create light effects. For example a neon-light effect.
This kind of material is a light-emitting material. It will create light and shadows like an Omni Light.
Let's check out the steps we are going to do:
1. Change in the material editor the Standard material to an Architectural -image 1-.
2. Choose the color of your glowing material in the diffuse color slot.
3. Now go to the setting "luminance cd/m2". This setting allows you to create a material which is able to emit light. This setting is very similar to the standard "self-illumination" slot. But in the architectural material you can add a value which is much more higher than 100. The higher the value the brighter the material's light emission.
Interview with Thiago Costa: Lagoa Technologies
Thiago Costa
A native of Brazil, Thiago Costa created Lagoa Technologies (lagoa means small lake in Portuguese) to generalize physics formulas into one unified formulation. Thiago's physics framework Lagoa Multiphysics became widely popular with over one million views in less than one week. Prior to creating Lagoa he has worked extensively in the post-production industry in Brazil, the United States and Canada and have participated on films such as "Predators", "G.I. Joe: The Rise of Cobra" and "Assassins Creed Lineage" and found Softimage ICE the ideal platform for developing tools.
Ubisoft uses Autodesk games technology to create Assassin’s Creed: Brotherhood
In 2007, Ubisoft Montreal created a third-person action-adventure game named Assassin’s Creed. The universal success of the top-selling, award-winning game set in both the distant past and the not-so-distant future lead to the creation of Assassin’s Creed II, which saw present-day protagonist Desmond Miles reliving the genetic memories of ancient assassin Ezio Auditore da Firenze, all of which take place in Renaissance-era Florence, Italy. The second installment also proved a huge success.
Now, the Ubisoft team has raised the bar again for Assassin’s Creed: Brotherhood, an ambitious new entry in the evolving story of the assassin that is the first to include a multiplayer mode.
Assassin’s Creed: Brotherhood picks up where the second installment concluded, with players being reintroduced to both Desmond and Ezio, who has now become a Master Assassin and moved to the much larger city of Rome. Ezio’s mission has also grown in scope and responsibility, as he attempts to build a brotherhood of assassins to vanquish the evil Templar Order and a new arch-nemesis, Cesare Borgia.
Ubisoft artists and engineers used the powerful combination of Autodesk® 3ds Max® and Autodesk® MotionBuilder® software, together with Autodesk® HumanIK® animation middleware in the company’s proprietary game engine, to create the biggest Assassin’s Creed title so far. Read more >>
Luxology Modo 501 is released
Modo 501 now released with some featured of Rendering, New Modeling Tools and Hair/Fur.
Read more >>
Read more >>
3D Motion and Position of Text Characters with After Effects
Typography is one of the qualities upon which we base most of our design work, and the type animation engine in After Effects offers a gamut of ways to express typographic flair. One of my favorites is the ability to control the 3D motion and position of text characters. When combined with simple camera moves, depth of field, and some real-world studio tricks we use every day, the results can be—literally—powerful. Let’s get started.
'Displacement Map Chainmail'
Software Used :
3ds Max and mental ray
Step 1 : Modeling
In this tutorial I want to show a relatively easy technique for making a chainmail in 3ds Max using a displacement map and mental ray. In this example I’ll show how to make the displacement map and how to get a good quality render with as few artifacts as possible using a simple Arch & Design material. The idea is that you can use this setup to create a tileable chainmail texture like I used on this knight (Fig.02).
Making Of Horned Man

The Making Of Horned Man by Paul Large, website www.opifex.co.uk , email : 0x_my_s0x@hotmail.com . The image started as a sketch inside ZBrush and grew from there into the final image almost by accident. Sketching characters in ZBrush is a great way to concept ideas, mess around with forms and come up with cool new things. After the sketch I retopologised the head section of the model and from there used the polypaint tools in ZBrush to create the textures. Rendering was handled with Mental Ray in 3ds Max. I find Mental Ray to be the most accessible of the available rendering systems for Max, and the fact that Max already comes with it makes it great. Also, having used XSI for many years, the creation of shaders in Mental Ray has become second nature to me
source : www.3dtotal.com
Making of Obidos
The making of Obidos by Hugo Silva, web site : www.hugosilva.com . He inspired by a few personal photos from Obidos (another ancient village with a sweet little castle), from a street lost in the corners of this village, but especially this photo (Ref. Photo A) was taken with the purpose to recreate it in 3D. source : www.cgarena.com
Taking the new Autodesk Mudbox 2009 for a spin and a sculpt

Mudbox 2009, the second generation of Mudbox is an amazingly easy to use digital sculpting tool that takes away all the technical aspects of working in 3D and lets your imagination and creativity flow. This may sound corny, but it really is that easy to use, and impressively fast.
The latest version added several new sculpting brushes, along with an entirely new, and much anticipated painting system. Read more >>
source : www.cgsociety.org
X-Men: Extreme Makeover

In this week's podcast we talk to Greg Strause, of Lola and Hydraulx and John Bruno visual effects supervisor of X-Men, about the amazing 25 year digital facelifts in X-Men: The Last Stand. We are also joined in our companion written story by Eric Saindon who headed up the Weta X-Men 3 team . Read more >>
Announcing ZBrush 4

ZBrush 4 will be a free upgrade for all registered users of ZBrush on Windows and Mac systems.
Getting ready for the upgrade is easy, and linked to your Support Account
Making of From the hoop
Making of From the hoop by iamyogStory of From the hoop is inspired by Earl Manigault's life. Earl Manigault was one of the greatest basketball player of his generation. Mentored by Holcombe Rucker through his youth he became the star of his high school team. As an universitary champion, he seemed destined to shine in NBA. But before the transition, he fell into drugs and lead his life far away from the basket. After dark years made of jail, drugs and friend's death, he gave up this world to return in the right way to Harlem. He started the "Walk Away From Drugs" tournament for kids in Harlem. He died in 1998 from a heart failure. Read More ....
Source : www.3dm3.com
Subscribe to:
Posts (Atom)


